....... an exquisite boutique for that something special


Showing posts with label bags. Show all posts

Saturday, July 12, 2014

Handsewing Knitting

I have been doing a hand stitching class with a lovely Korean lady here in Auckland
She is a fantastic teacher and has taught me many new techniques.

The above bag is a large carry bag with pockets on the inside and a large drink bottle pocket on the outside.
This entire bag is hand stitched, hand quilted and hand embroidered.
The handles on the bag have also been hand stitched on.

I loved making this bag so much. I love hand stitching the Japanese method... not much use for a sewing machine handsewing everything.

I also did a class to make this owl brooch. 
All hand made with no sewing machine either.

I am also enjoying knitting. 
I have been knitting mainly at night.
This is a cute knitted vest, booties and beanie for a newborn little girl. 

Hi to my new followers.

Tilda tutorials are coming soon.... Im working on these

Happy sewing


Tuesday, June 5, 2012

I've been busy...

I have been asked to take a a workshop in a few weeks for a few ladies.
They want to make a brooch or a hanging heart from felt.
This is the first sample I came up with for them was the brooch in the above photo
I had to make it simple and easy.. hopefully this is simple and easy

Also...
A humbug bag for my son.
He needed a pencil case for school. I thought of making him up a humbug bag.. but this one is too small.. 
I made it from the laminated fabric that I will have on my website.
It makes the perfect pencil case fabric... I now have a larger one cut out and ready to go. This will probably get used as a toilet bag for trips away.
\
My little man's name is Zac.
I made a felt tag for the zip and embroidered his initial on it.
He thought that was rather 'cool' as he has just learnt how to write his name.

On the weekend I purchased a kit to make a gift box.
I love making gift boxes and cards. I love making a gift that little bit special.
The kit contained the cardboard and papers to make these.
They didn't take long to make... I had them made in no time.

When I receive my Tilda papers I will put a tutorial up on how to make them.
They will look just gorgeous made out of Tilda product.

My Tilda product is still in transit... say no more....

and on the weekend when I purchased these kits I listened to a lady talk about 'Declutter"... what a very interesting talk that was. I am a self proclaimed 'messy'. I have been seeking to get myself in order for a number of months. I have been throwing so much away and getting more minimalistic.

What the lady said about a messy is:
She is creative
She is 'task' orientated
She is a perfectionist
and
She is ambidextrous (can do alot of things at once)

I was rather encouraged .... A messy isnt so bad after all.

In my sewing room I always make a creative mess!

 in the last week I have been busy getting my website sorted.. this is incredibly time consuming. It is taking me alot longer than I had anticipated. In amongst all this I have moved my sewing room from a small room in our living area into a spacious bedroom one of my son's vacated a little while ago...
What a huge mission this has been!! I was SHOCKED at how much stuff I had in my possession!  What is so great is that everything is sorted out.. everything is in its rightful place, my sewing machine has its own little corner... and I have decluttered.. before the declutter talk.. which was great.

Photos of my new room will be coming soon.

Have a great day


Monday, April 16, 2012

Humbug Bag Tutorial


Humbug Bag Tutorial


Requirements:An Outer fabric - 17" x 12"An Inner fabric - 17" x 12"
Pellon - 17" x 12"
Contrast fabric for the binding and tabs - Binding cut to 2 1/2" wide x 12"
Tabs cut 2 1/2" wide by your desired length
Zip 13" or 35cm

NOTE: You can change the size of the bag by changing the zipper size and the length and depth of the fabric

Sandwich the three layers together
Do some freemotion quilting to attach them together

Iron binding over

Attached binding by folding over the raw edge of the 12" sides
The middle of the binding sits flush on the raw edge.
Sew the binding on with one sewing line

Then attached the zip.
Pin the zip to the inside fabric as shown above. Make sure the zip is unzipped right to the bottom, it is alot easier to attach it this way.... this is not done in the above photo.

Sew the zip on one side then on  the other, as shown above.... this photo is looking at the zip from the inside.

Do up the zip and turn inside out.  Pin the bottom of the bag, adding the tab in by the bottom of the zip.
Sew the bottom of the bag right sides together. Cut the excess zip off once you have done this.

Now sew the other end of the bag.. this time vertical so it looks like the photo below. Be sure to add the other tab to the top of the bag as shown in the photo.

Now your bag is finished.

More examples of this bag:
Made with Tilda fabrics and Tilda Wool Felt for the tassel heart

Made with Tanya Whelan fabric

Monday, July 4, 2011

Humbag Tutorial and....

I have been enjoying making these bags of late.
The above bag is made from Tilda fabrics
I love the idea of the bead tassel. So with this bag I decided to do something abit different
I used Tilda felt. I made a little heart and did a bullion stitch rose on it. I have attached it to the zip
with some wire and beads... just makes a nice touch to finish it of


A closer look

This is also made from Tilda fabrics
Im on  a roll making up a Christmas present stash

The embroidered roses are done with Tilda threads too

A closer look at the fabric and the simple free motion quilting

If you want the tutorial
click HERE to go to the page

Happy sewing


Friday, June 24, 2011

Creation for today

I made this up today and took photos as I created.  I think these are called Humbug Bags? not sure.
The tutorial for this will be up next week. I haven't the time to do it today.
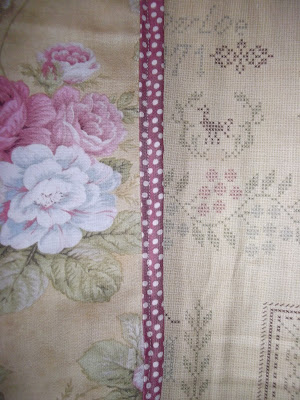
The fabric I used for this is a story of fabrics I purchased from Annie Downs last year when we were in Australia.  The inside fabric is a similar colour to the outside but has a old sampler cross-stitch pattern printed on it... Ill show that in the tutorial. 


The  back of the bag.... with my little tags I made recently... just had to show you that. :0)

Have a great weekend.


Tuesday, June 21, 2011

Some sweeties

I have made a special friend in blogland. 
Cat is her name.
You can visit her blog HERE
We have done the Tilda Swaps together.
Today I went for lunch with Catherine (Cat) is her nickname. I made her the above cupcakes in her favourite colours. Pink, red, mint green and aqua blue. The box was an old shoe box that I kept. I covered it with paper and it fitted 4 cupcakes in perfectly....

I LOVE to decorate cupcakes.

I purchased the little roses from a specialised cake shop

I also made Cat this little bag.
I have one and use it for my scissors, cutters etc. I used a vintage zipper and Tanya Whelan fabrics

I made a bead tassel ( I guess you would call it) to hold when opening
These are very easy to make with wire and abit of twisting.

My new little tags

The inside.

I am going to do up a tutorial for this bag soon.... on the to do list. 

Also, I didnt win the competition for Favecrafts... but I was so very happy to have made it into the Top 10.

Take care


Tuesday, May 3, 2011

A Catch Up

I made this little bag for my daughter. I was trialing the pattern to put up onto my "Free Sewing Tutorials" page. Keep an eye out for this tutorial if you are interested. Im into quick and easy designs. Im always trying to work out shortcuts. This cute little drawstring bag is quick and easy.

I also want to share with you my Tilda Easter Swap goodies.

As I mentioned a couple of posts back I have a new laptop.. it is not the best at  uploading photos to blogger. It takes alot of time. So I have to find a better way.... anyhow... photos below

This are so cute.. made from a poly eggs and wrapped with vintage fabrics. The drawstring bag is made from vintage chenille... I love it... This were made for me by Sena from the USA...

Also
Sena made me a Hare


So cute with wire in the ears.. just love here to bits.. Her dress is made from vintage fabric too.

I also had Ana Maria as my other swap partner


Ana Maria made me the most lovely bag and eggs... three hanging ones. With Tilda buttons on them.. just love these to bits
She was so kind and also sent me some fabrics and buttons


Love these too.... Thanks Ana Maria... and Sena for your kindness and going the extra mile.

I also forgot... I got some chocolate yum yum... well that is gone!! havnt photographed that..

My son's 4th birthday cake.
Spiderman was his request.
I havnt made the best job of the icing ... but it will do.. He loves it and that is the main thing

We got away for a few days last week. We camped at this lovely place we go to up at the Bay of Islands here in New Zealand
We had the most amazing weather.
It was pouring down with rain in Auckland and we had sunshine and no wind.
We had a fire in the evening and cooked our dinner on it.
It was great and we had a lovely time together... my hubby, me and our two youngest children

Happy sewing!

Thursday, March 24, 2011

Sweet Little Bag and other things....

I purchased this bag pattern a little while ago from Geta's Quilting

This cute little bag is made from one of the patterns.. Bella I think the pattern is called. 

My little girl took it to school for news and the teacher put an order in for Easter.
I thought the little side pockets would fit a couple of caramel eggs inside and of course the inside of the bag would have to have some too!

The yoyo centre is a vintage button from my button collection

The little bunny is one I made last year for Easter. I made a pink one and a blue one.
The pattern for these little cuties is from a Homespun Magazine. The designer was Cath

Click HERE to see the larger bag made from this pattern I made a little while ago.


Also

I decided to have a go at a QAYG quilt.

Here are the blocks made up
As you can see it is made from one of my favourite colours PINK!
I may be giving this away to a dear friend that is going through a major crisis. I just have to find out if she likes pink!

Last week I attended the craft show. In New Zealand we have a dress designer called Annah Stretton. I have had an eye on her wrap dress and skirt for sometime but didnt want to buy the price for it. Well at the show they were selling the kit sets to make these amazing dresses. 
Guess what...??
I bought one
Received it yesterday in the post
and finished it last night.
It took me about 8 hours to make... at times I was finding it very hard to make and was going to give up. I am useless at reading patterns.. but I forced myself to do so.. 
The final outcome is amazing.. and I cannot believe I actually sewed it myself..


It looks exactly like this


and it can be worn all sorts of ways


If you are interested in entering the giveaway for a Jill Mass doll Pocket Angel then go to the below post and to go into the draw I will draw it early next week.

Happy sewing


Related Posts Plugin for WordPress, Blogger...