....... an exquisite boutique for that something special


Tuesday, June 19, 2012

Covered Notebook Tutorial


You will need:
A notebook
Craft Glue
Wadding
Fabric
Embellishments such as yoyo's, felt, lace etc


Cut the wadding to the size of the whole notebook opened, cover to cover

Glue the front cover of the notebook and press the wadding onto it.

Do the same for the back as pictured above

Cut the fabric slightly larger than the notebook allowing you to fold the fabric over

Cut the corners and the centre of the fabric on the diagonal. Fold over as pictured. Make sure you glue around the edges before folding. Dont use alot of glue
Now is the time to embellish the front with the lace, if that is what you want to do. As you have to have the edged fold over to the inside of the cover as the fabric... the below picture show how to cover up the untidiness of this. If you are going to use a yoyo skip this step.

Glue the front page and the back page as pictured above to the front and back cover of the notebook. 
This will cover up the folded fabric edges

You have completed your notebook... now time to embellish it.

For this notebook I used some lace and some daisies. 
on the below notebook I used a yoyo with a felt base.


Washi Tape Pegs Tutorial

Washi Tape Peg Tutorial

You will need:
Spring Pegs
White Paint
Paintbrush
Washi Tape
Felt for the Felt Rose, flower or whatever decoration you choose to use.

Paint the pegs and wait for them to day.

Stick the washi tape to the inside of the peg as shown in the photo

Press along the outside of the peg, making sure the tape is centre.
Cut the washi tape a little longer

Stick it to the inside of the peg


Decorate with a felt rose, flower or whatever type of decoration you desire.

Enjoy!!

Monday, June 18, 2012

My last 10 Days

This is a pincushion design I came up with last week.
This will be sold as a kitset in my webshop that is soon to open.

I received my first box of Tilda fabric on Friday.
This would have to be one of my favourite ranges in Tilda

Also
I joined up in a Pincushion Swap.
I tried something slightly different to what I normally make.
Needle felt... I used roving and felted it with a felting needle and created
this
The cherry is also made using a needle felt.
and of course I had to add some polymer clay pins

I also made a needle felted cupcake applique for the needlecase


This was loads of fun to make.
I wasnt that happy with the quality of the workmanship but I had run out of time and had to send it on.
I made it for Magaret... I will put her blog up soon.. I have to go into another email to fetch the link.

This is what Margaret made me.
Her work is just beautiful
The egg cup is a vintage Noritaki China Egg Cup.. something I just love

A closer look.

Have a great day


Thursday, June 7, 2012

Little pegs with Washi Tape and ...

I am on a Washi Tape Roll at the moment .. excuse the pun.

I love the designs that washi tape come in. These are two of them that I have purchased recently used on pegs. I will use these in my craft room... they will be very useful.

The felt rose is from my felt rose tutorial. It is a very mini version. The strawberry is just something I came up while playing around with my scissors and felt.

A cute little gift


I went shopping yesterday at a gorgeous embroidery shop.
They had 132 types of different threads... wow it was like Christmas. I bought  some silk ribbon,  wool thread, silk thread, hand dyed thread and some cashmere wool fabric. Last night I got creating some booties using the cashmere. They are all handstitched together using a lovely wool thread.  These will go into a box I am putting together for the future grandchildren... there are non on the way... just thought a box would be something nice to work on.

I hope you are all having a wonderfully creative week.


Tuesday, June 5, 2012

I've been busy...

I have been asked to take a a workshop in a few weeks for a few ladies.
They want to make a brooch or a hanging heart from felt.
This is the first sample I came up with for them was the brooch in the above photo
I had to make it simple and easy.. hopefully this is simple and easy

Also...
A humbug bag for my son.
He needed a pencil case for school. I thought of making him up a humbug bag.. but this one is too small.. 
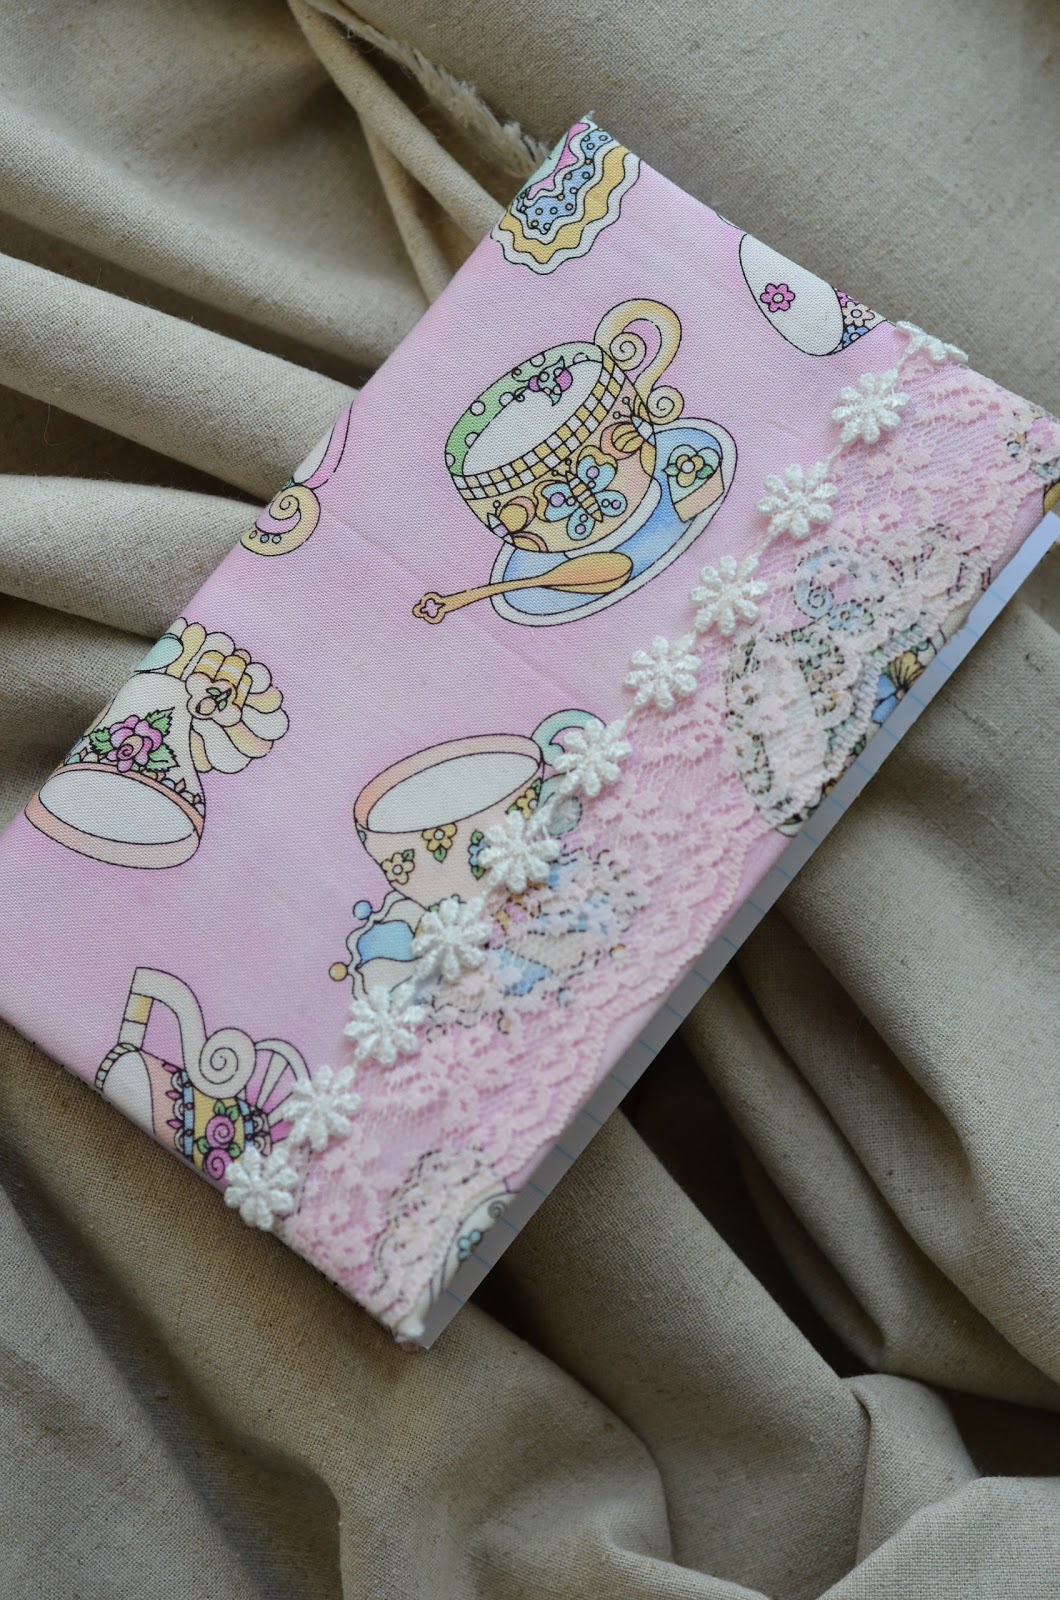
I made it from the laminated fabric that I will have on my website.
It makes the perfect pencil case fabric... I now have a larger one cut out and ready to go. This will probably get used as a toilet bag for trips away.
\
My little man's name is Zac.
I made a felt tag for the zip and embroidered his initial on it.
He thought that was rather 'cool' as he has just learnt how to write his name.

On the weekend I purchased a kit to make a gift box.
I love making gift boxes and cards. I love making a gift that little bit special.
The kit contained the cardboard and papers to make these.
They didn't take long to make... I had them made in no time.

When I receive my Tilda papers I will put a tutorial up on how to make them.
They will look just gorgeous made out of Tilda product.

My Tilda product is still in transit... say no more....

and on the weekend when I purchased these kits I listened to a lady talk about 'Declutter"... what a very interesting talk that was. I am a self proclaimed 'messy'. I have been seeking to get myself in order for a number of months. I have been throwing so much away and getting more minimalistic.

What the lady said about a messy is:
She is creative
She is 'task' orientated
She is a perfectionist
and
She is ambidextrous (can do alot of things at once)

I was rather encouraged .... A messy isnt so bad after all.

In my sewing room I always make a creative mess!

 in the last week I have been busy getting my website sorted.. this is incredibly time consuming. It is taking me alot longer than I had anticipated. In amongst all this I have moved my sewing room from a small room in our living area into a spacious bedroom one of my son's vacated a little while ago...
What a huge mission this has been!! I was SHOCKED at how much stuff I had in my possession!  What is so great is that everything is sorted out.. everything is in its rightful place, my sewing machine has its own little corner... and I have decluttered.. before the declutter talk.. which was great.

Photos of my new room will be coming soon.

Have a great day


Related Posts Plugin for WordPress, Blogger...