....... an exquisite boutique for that something special


Monday, April 30, 2012

My weekend

As you know I had my son's 5th birthday on Saturday.
My baby is now off to school...well he has been there for a week now.
As he is my baby. today Im feeling a bit lost. Last week was abit of whirlwind and I didnt really feel it...today Im feeling it.. just a little

We had the use of a good friends gutted out factory for the 'Race Car Party'
We hired six pedal cars.. these were a great success. The kids just LOVED them.
I bought some gold cups from the $2 shop and some gold medals. 
I managed to get some balloons with the racing car flag on them
Flags for the cupcakes. 

It was a great day.

We have a friend that owns a Lamborghini. Zac, loves Lamborghini cars and his Uncle bought it down especially for him to sit in... as you can see by the look on his face in the above photo.. he was very excited.!!

In the top left pedal car is our eldest daughter. She thought she would attempt to pedal around.. she didnt get too far... 

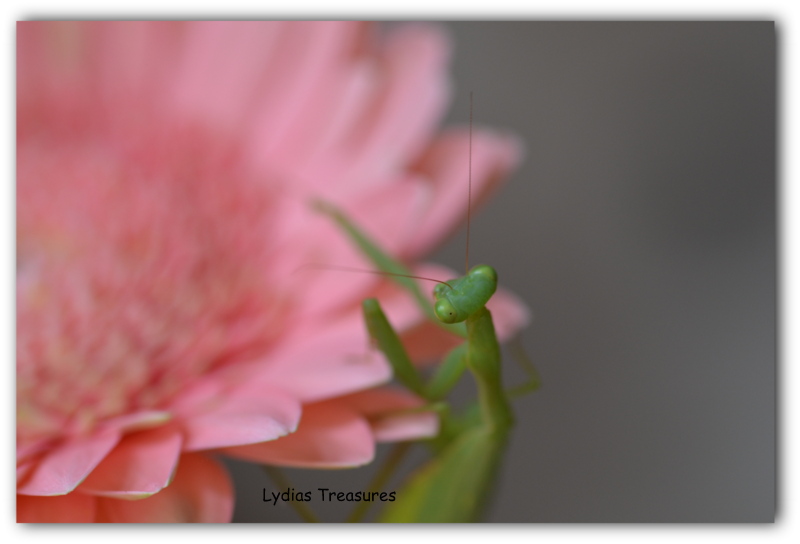
After the party was over I was sitting at the table at home. I have a vase of flowers on the table and decided to take some photos. I took one photo and then saw a Praying Mantis on the petals.
So I decided to have a photo session with a live specimen...

I hope you dont find this too boring but I was very fascinated what my Macro lens could do.....


If you have trouble loading the pictures, please let me know and I will downsize them... 

...so that was my Saturday.


Have a great day


Tuesday, April 24, 2012

The last few days...

It was my friend Suzy's funeral today.
Last night myself and three other friends prepared a couple of tables in her favourite colours...Pink and White.
It looked a little girls party...which is what Suzy would have loved. There were a number of children there and they just loved this. We called it 'Suzy's Teaparty'

The last conversation I had with Suz was about Cakepops. She was in a hospice that wasnt far from one of our favourite kitchen shops, 'Milly's', Im sure some of you New Zealand ladies would have heard of it. She asked me if I was going to go there and if so what was I going to buy! well, I went and ended up buying a few things for my love of cupcakes and cake pops.

My cakepops.
Dipped in pale pink chocolate and then dipped again in white chocolate.
Yummy!


I picked some flowers from my neighbours garden, wrapped a bow around the stems and put them on the plate of meringues I made. I put a small amount of pink colouring in the cream. I got this idea from a board that Suzy had pinned on Pinterest.

This is a closeup photo of one of the beautiful little rosebuds.


I was walking around the garden admiring the beautiful roses.
It was a beautiful morning this morning, our neighbours have a water feature that was just making that soothing sound of water. The sun was shining and it there was a crisp feeling in the air. I looked down and saw the morning dew on the rose petals. 
Just beautiful


So it has been a very busy few days.

Now I have to prepare my sons 5th birthday Racing Car Party for Saturday.. I do hope I get some sewing done at some stage.

PS... Colour Swap Partners have been emailed out.
If there is anyone out there that has not received your email please get in touch.

Hugs


Friday, April 20, 2012

Cake

Yesterday in my grief I decided to bake.
It was my baby's last day at kindy today. I had to bake the cake!
I had to find the strength to pick up the recipe book and getting creating.
With the helping hands of my two youngest we got to it.
I thought of my friend Suzy the whole time I was icing this. I knew that this is just what she would have wanted me to do.
As I coloured the icing, and filled the piping bags I could just see Suzy's excitable expressions. 

My son is 5 next week. 
He starts school on Monday.. Oh boy, how the years have flown. It really hasnt hit me yet that he is going to school. He is a delightful, full of life little man. He is full of love and loves life.

Next week I have two party tables to organise... so keep an eye out for the photos.. 

Thanks to you all for your kind messages.  
It was really lovely hear from you all.

Have a great weekend

Hugs

Thursday, April 19, 2012

Dedicated to my friend.....


My dear friend Suzy went to heaven this morning.
Thank you to you dear ones that lifted her up in prayer. 
She is in a better place rejoicing in heaven - out of her suffering. It is the ones that are left behind that hurt and grieve.

I want to dedicate this post to my dear friend:

Suzy and  I shared a common love of  making things, baking, planning parties and all things pretty, especially  Christmas - decorating, crafting and cooking. Last Friday when I saw her she was so frail and weak. She was whispering but she looked at me, eyes wide open and was so excited to talk to me about my website, Pinterest and my pins and making Cakepops. She was such an encourager. Always encouraging me with my creativity and many other areas in life.

Party Prettiness

I loved so much about her:

 Her enthusiasm for creating and teaching me a few things
Her gentleness and kindness
Her sweetness - My little girl described her Aunty Suzy as a sweet person 
Her thoughtfulness - sending handmade cards just to say she is thinking about me
Her sense of humour - even in her illness she still could laugh
Her love of prettiness - cups of tea and a cupcake
Her love of PINK
Her love of roses

I could keep making a long list... 


Girly Party Skewers - Suzy loved to plan parties


Suzy's favourite Gingerbread men

Her LOVE of cardmaking

Love you Suzy and thanks for the precious memories


PS - Colour Swap ladies - I will send out partner information on Monday or Tuesday of next week. I have nearly everyone paired up. Looking forward to seeing all your creations.

Monday, April 16, 2012

Humbug Bag Tutorial


Humbug Bag Tutorial


Requirements:An Outer fabric - 17" x 12"An Inner fabric - 17" x 12"
Pellon - 17" x 12"
Contrast fabric for the binding and tabs - Binding cut to 2 1/2" wide x 12"
Tabs cut 2 1/2" wide by your desired length
Zip 13" or 35cm

NOTE: You can change the size of the bag by changing the zipper size and the length and depth of the fabric

Sandwich the three layers together
Do some freemotion quilting to attach them together

Iron binding over

Attached binding by folding over the raw edge of the 12" sides
The middle of the binding sits flush on the raw edge.
Sew the binding on with one sewing line

Then attached the zip.
Pin the zip to the inside fabric as shown above. Make sure the zip is unzipped right to the bottom, it is alot easier to attach it this way.... this is not done in the above photo.

Sew the zip on one side then on  the other, as shown above.... this photo is looking at the zip from the inside.

Do up the zip and turn inside out.  Pin the bottom of the bag, adding the tab in by the bottom of the zip.
Sew the bottom of the bag right sides together. Cut the excess zip off once you have done this.

Now sew the other end of the bag.. this time vertical so it looks like the photo below. Be sure to add the other tab to the top of the bag as shown in the photo.

Now your bag is finished.

More examples of this bag:
Made with Tilda fabrics and Tilda Wool Felt for the tassel heart

Made with Tanya Whelan fabric

The Quick Easy Purse Tutorial


Im doing some housekeeping... just moving my tutorials around.
So please bear with me as I repost these... 


The Quick Easy Purse Tutorial


Requirements

4 x 7" squares
Iron on pellon
button
dome (if desired)

Click HERE for template. This is a PDF template or pattern piece

4 x 7" squares


With right sides together sew two of the square together (The two fabrics for the front) then sew the other two together (These are the two fabrics for the inside of the purse)


Cut corners as per the pattern at one end. This will be the front flap of the purse. The inside and the front fabrics.

Press
Then cut out a piece of iron on pellon and iron to the wrong side of the fabric. I iron this onto the front fabric piece.(On the wrong side)

Put the right sides of front and back pieces together. Sew all the way around. Start at the bottom, where the corners are not cut. Leave a gap where there is no sewing so your can turn the purse in the right way. The is the top of the inside of the purse.You can either add a binding over the unsewn edge (above) or sew it up and add lace or braid. The instructions below are for the binding option


Cut a piece of fabric 8" x 2"

Fold in the end edges


Sew on to the top edge, right sides together, turn over then sew down, as you would if you were binding a quilt.

Then fold over as per the pattern piece instructions. The purse is folded into thirds. I used the largest buttonhole stitch on my sewing machine to sew both the sides together. Looks very effective.

Add a dome on the inside and a button on the front or do a button hole and add a self covered button.


All finished

Happy Sewing


Related Posts Plugin for WordPress, Blogger...