....... an exquisite boutique for that something special


Friday, October 28, 2011

Tilda Sew Along Doll Part 4 and other things

Well ladies....
I have had a busy week. 
I am involved in a Christmas Challenge on the weekend. This challenge involves me teaching one of the activities. Cookies iced with royal icing. I have been baking and decorating samples.. 

So the Tilda Doll is on a go slow.


Face....
Use a water proof marker. Mark with a pencil where you want the eyes to go.

Use the black marker to mark eyes

Get a blush and small eye shadow brush

I start in the middle of the cheek ...  with a circular motion I move it around so that the blush fades out
Do this with both cheeks

DONE

Now

Cut out the panaloons
Skirt
and petticoat

Cut out the wings

Sew the braid and the lace to the pantaloons and skirt piece
\
Next week we will finish the skirt, pants and dress her 

Just to prove that I have been busy
A candy cane Christmas Tree ... A lovely centre piece for Christmas
I found this tutorial online.. I will have to put the link up when I have a spare 5 mins to search for it.


Eatible glitter on the candy canes and the icing

Samples

To be iced for samples

Have a great weekend


Wednesday, October 19, 2011

Tilda Sew Along Doll Part 3

Sorry ladies on the delay for this. I have been busy with the kids... school holiday time.


Make sure the fabric is folded to the inside to create a folded each, so the arm fits snuggly onto the body.


I use double thread for extra strength.
Stitch to the underarm of the arm piece
Then 

 Take the needle to the body and do a stitch to secure, as  shown in the photo.


 Make sure your stitches are close to the edge of the arm and the body so they can be an invisible as possible.


Make sure the seams match


 One arm stitched on... now do the other.


 Now stitch the bottom of the body. Make sure the fabric is folded in. Stitch as you wish. This stitching gets covered my the legs so it doesnt really matter how tidy it is.

Legs..... make sure the top edge is folded in....
The below method is my method of doing the legs.. not necessarily the way it is done in the book

 Put right sides together, as per the photo. Make sure the edges match and are as even as you can get them. Stitch through all thicknesses with smallish stitiches

Finished stitching her together.

 Now for the hair... this is the method in the book.. I normally do a different method. 
Place pins on the top of the head in a straight line going down the back of the head. Also put two on the side of the head which the hairbuns will go.
Now thread without securing from one side to the other going over the pins
 I added more pins for more cover. This method is a bit like weaving.
 When you have covered enough... as you desire thread a needle and secure the hair down with little stitches. Take the pins out as you go.
Roll some wool up to make hairballs. Secure these in place with needle and thread.
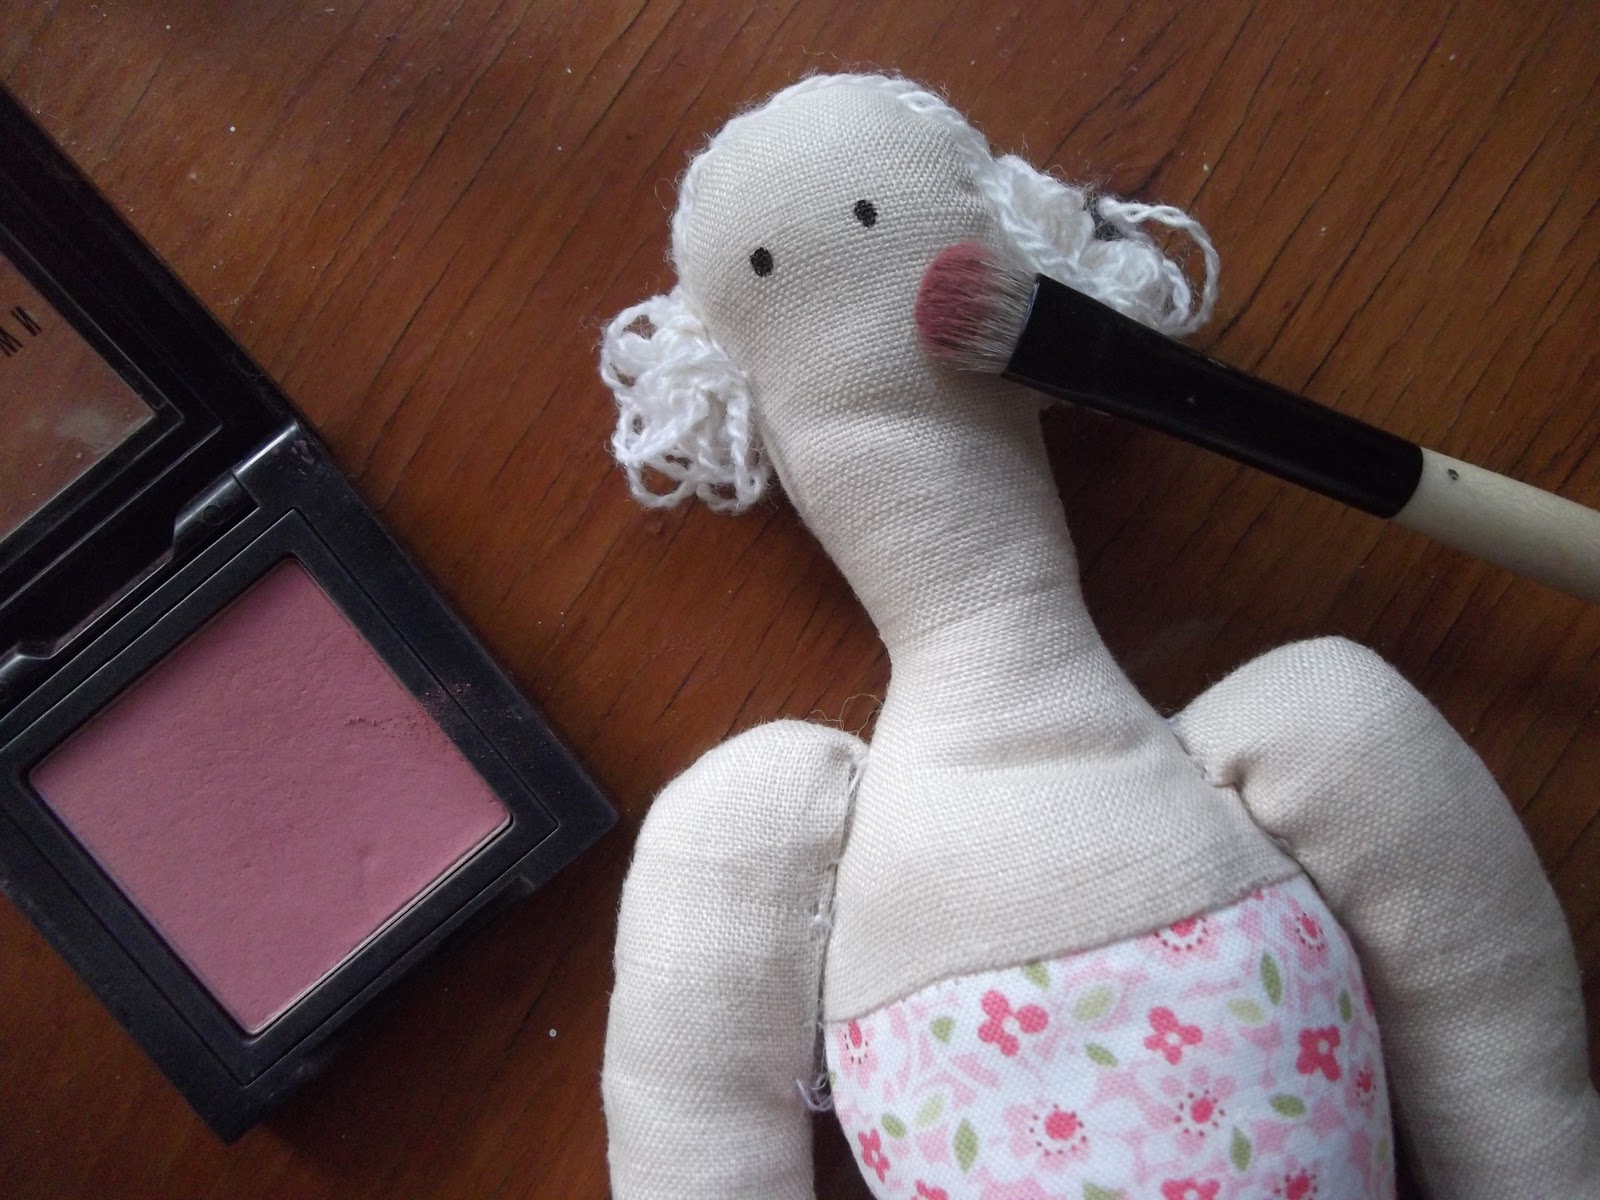
Your doll is now ready for the face and the clothes.


AND

Block Five is ready to download for the Full of Hearts Quilt
This has been one of the most popular blocks in this quilt.
Enjoy!!

Click HERE to go to the post for download

Tuesday, October 11, 2011

Tilda Sew Along Part 2

Turn out all the sewn pieces right sides out
Press all the sewn pieces


Take a small piece of stuffing

Press onto the end of a skewer stick

Push stuffing in with skewer stick or stuffing tool

Push stuffing to the end of the arm.(finger part) add small bits a bit at a time till all stuffed

The stuffing at the end of the arm......

Turn over the ends of the arms... this is the opening.... and will be handsewn to the body next week.

Take a larger amount of stuffing

Stuff leg to the knee

Sew across sewing line

Now stuff leg to the top


Stuff body with smaller amounts of stuffing and then a larger amount as you go....

The parts are now all stuffed for handsewing for next week.

PS.... the above process is time consuming


Monday, October 10, 2011

Tilda Cupcake Angel

Hello all.

This is my latest creation. I made her on Friday.

This little cutie is out of the latest Tilda book Tilda's Studio. The Cupcake Angel.
She was very simple and easy to make.
She is too big to be made into a brooch. I decided to put her on a skewer so I can put the stick into a pot plant or something. In the book she has a ribbon coming out of the top of her head so she can be hung from something.

Welcome to my new readers.
Thanks to all who emailed and left a comment for my giveaway. It was lovely to receive and email from some of my regular readers that dont have  blogs.... it was also lovely to hear from readers that do have them too.

I am hoping to have the second stage of the Sew Along up tomorrow on my blog. I have my children off school for the school holidays. So it may be later in the day tomorrow before I can get to it.

Take care


Tuesday, October 4, 2011

Tilda Sew Along Doll Part 1


How exciting!! Here is the first post for the much awaited Tilda Sew Along Doll

There are not that many ladies taking part but never mind, this can always be a great reference for people wanting to know techniques for sewing a Tilda Doll.

Glue all patterns onto cardboard and cut out, or as one of the Sew Along ladies suggested use freezer paper. This is a fantastic method... How to: trace pattern pieces onto freezer paper... iron onto the right side of the fabric and sew. The remove the freezer paper... this way you dont get left with drawn lines on you fabric. If you dont know what freezer paper is, this is a special paper used for quilters and is available and quilting shops. It can be used more than once which is a beauty of the product.


Cut two pieces of the top of the dress fabric and two pieces of skin fabric. When cutting these out make sure they will fit the head and shoulders for the skin fabric and the body for the dress fabric.
Sew these together across the top as shown in the photo.


Now place together the head and shoulder pattern piece and the body along the dotted line. Put the sewn pieces wrong sides together.
Make sure where they join is across the top of where the two fabric pieces join. This is going to make the head, shoulders and body of the doll.


Now trace all around the pattern pieces.
Pin the fabric in place so it does not move when you sew.
Now fold the skin fabric in two and trace the pattern pieces on to the fabric. 
Sew around the trace lines.. these are the sewing lines. Make sure that the bottom of the body, the top of the arms and the top of the legs are kept open, as we need to turn the pieces in the right way.

Now cut a little out from the sewing line. all the way around every piece.

That is all your pattern pieces ready for next week when we will turn and stuff.

Happy sewing and any questions I am happy to answer.


Related Posts Plugin for WordPress, Blogger...